Creating An Lubuntu Virtual Machine

In this post, I will create a Lubuntu Linux virtual machine using Oracle VirtualBox on Windows. If you want to follow allong, please see my post Installing VirtualBox On Windows. Lubuntu is a light weight version of Linux for older or under powered machines. It works well with Oracle VirtualBox.

Let’s Get Started

Using your favoriate web browser, browse to https://lubuntu.me/


On the Lubuntu landing page, click Downloads.
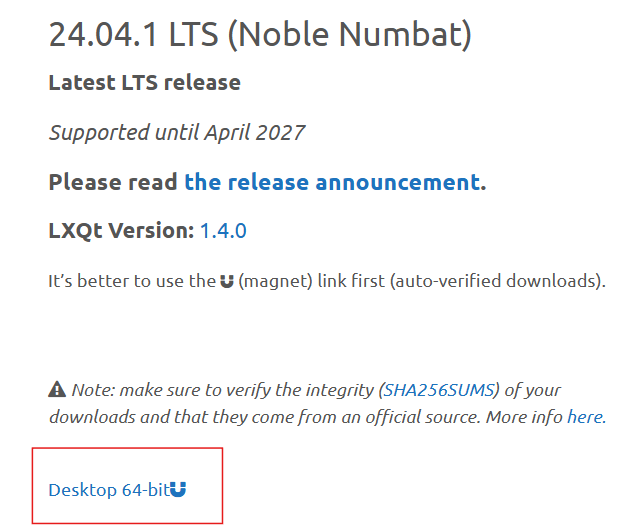

Under 24.04.1 LTS (Noble Numbat), click the Desktop 64-bit link.


The lubuntu-24.04.1-desktop-amd64.iso should download.

Open Oracle VirtualBox Manager.

If you want to follow along and you don’t already have Oracle VirtualBox installed, please see Installing VirtualBox On Windows.
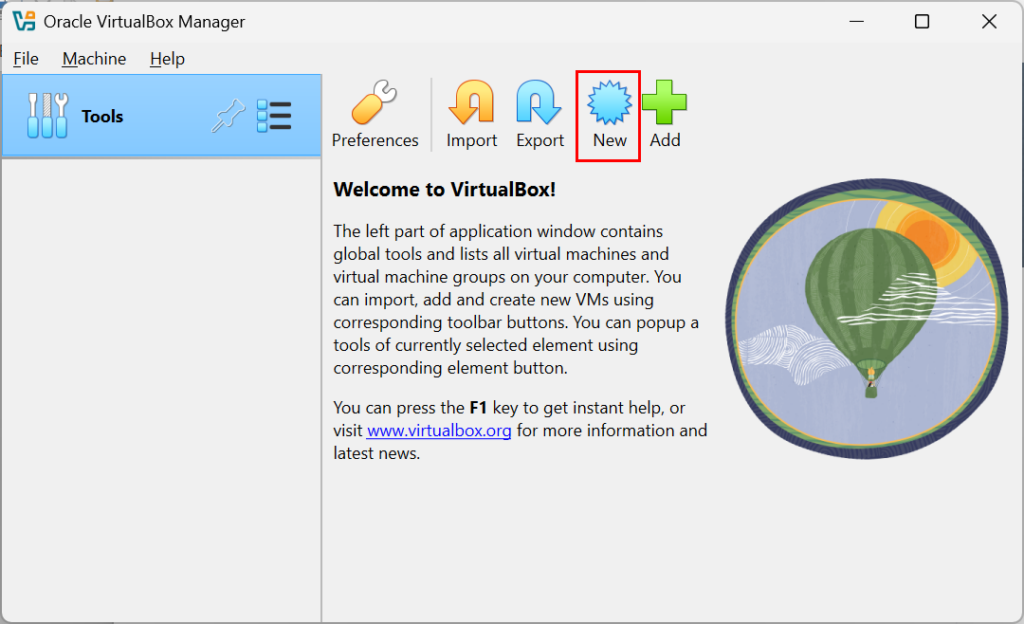

Once Oracle VirtualBox Manager opens, click New.
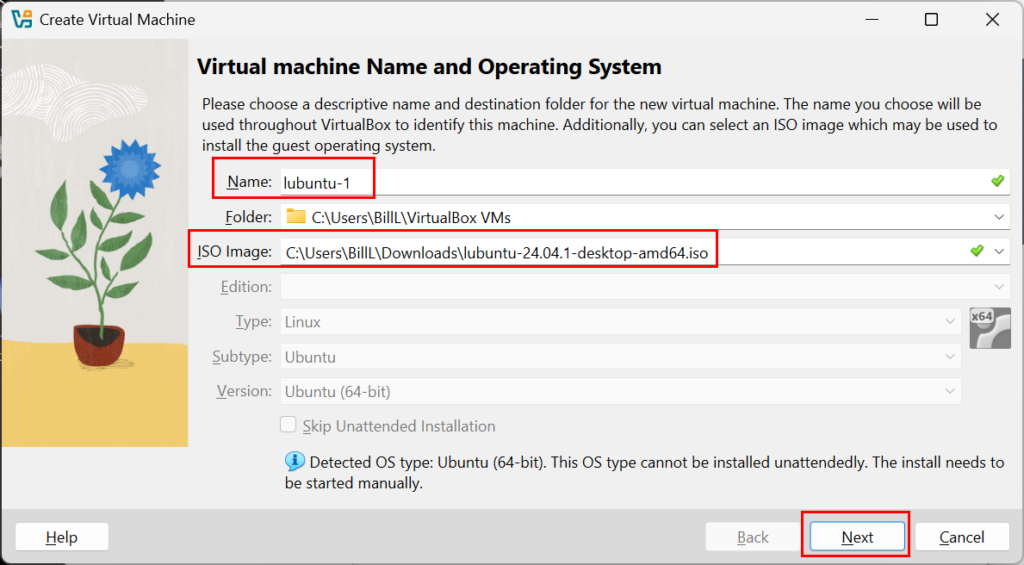

On the Virtual machine Name and Operating System screen, enter a Name, for the ISO Image, select the lubuntu .iso downloaded above, then click Next.
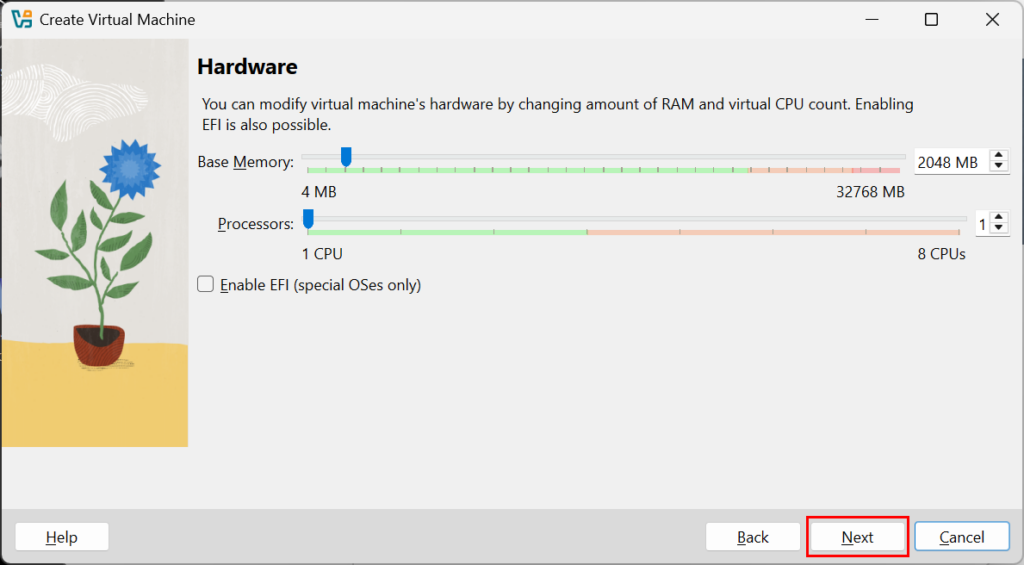

On the Hardware screen, leave the defaults and click Next.

Once you are familiar with installing Lubuntu on Oracle VirtualBox, you can try different settings to see what works best for you.
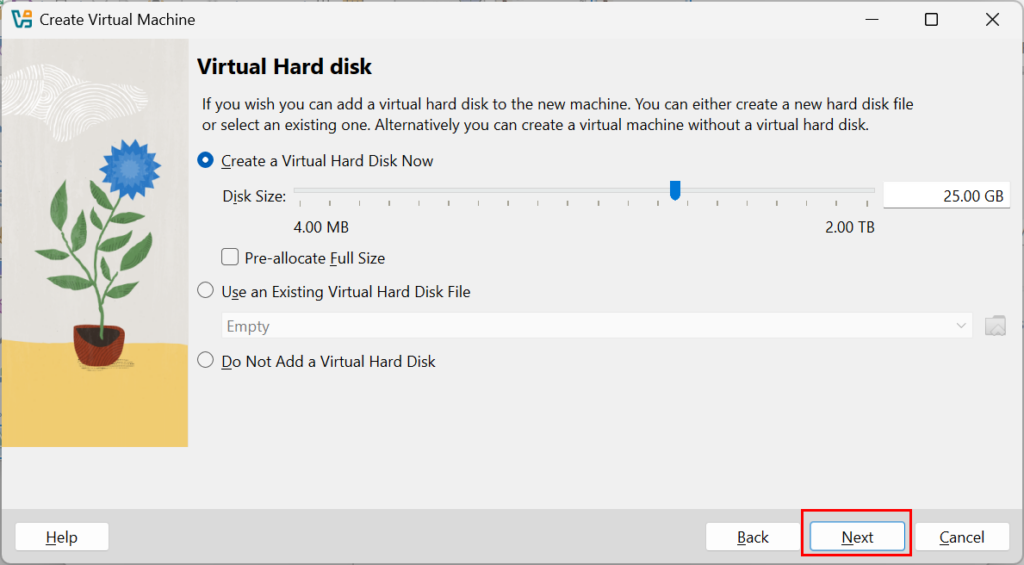

On the Virtual Hard disk screen, leave the defaults and click Next.

When it comes to virtual disk space, remember that you will be installing the operating system, adding applications, creating data and logs, etc. Make sure to provision enough space.
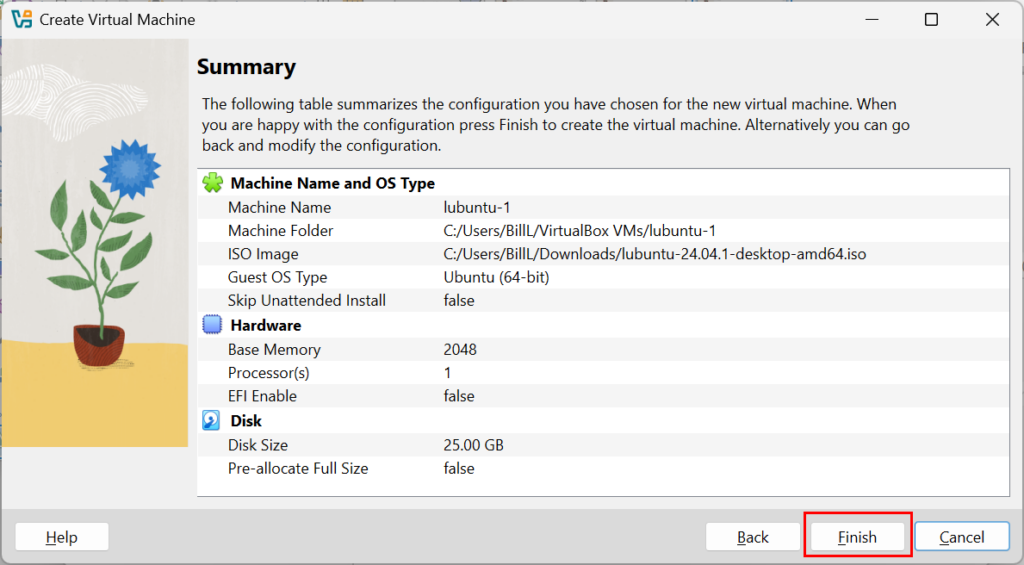

On the Summary screen, review the settings, then click Finish.
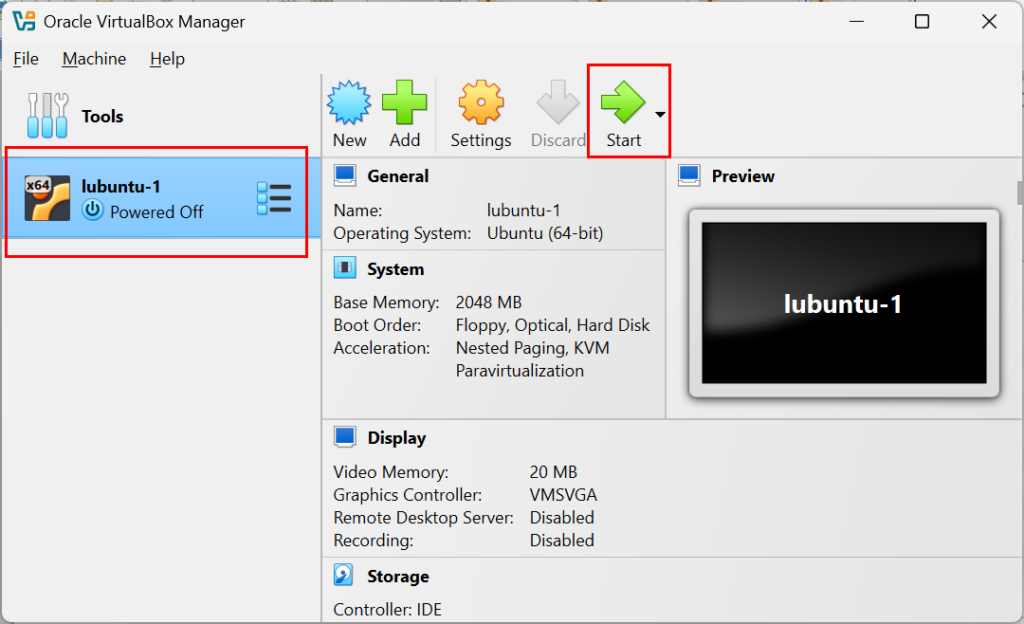

Back on the Oracle VirtualBox Manager screen, select the Lubuntu virtual machine and click Start.

You can also right click the Lubuntu virtual machine and click Start.
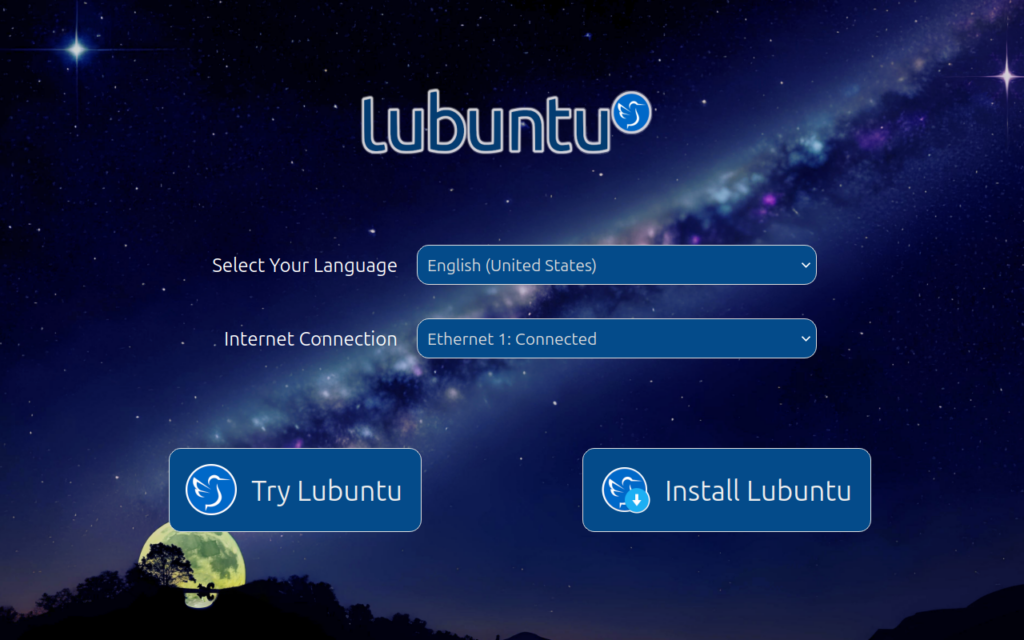

After a few minutes, you should see the Lubuntu start up screen. Click Install Lubuntu.
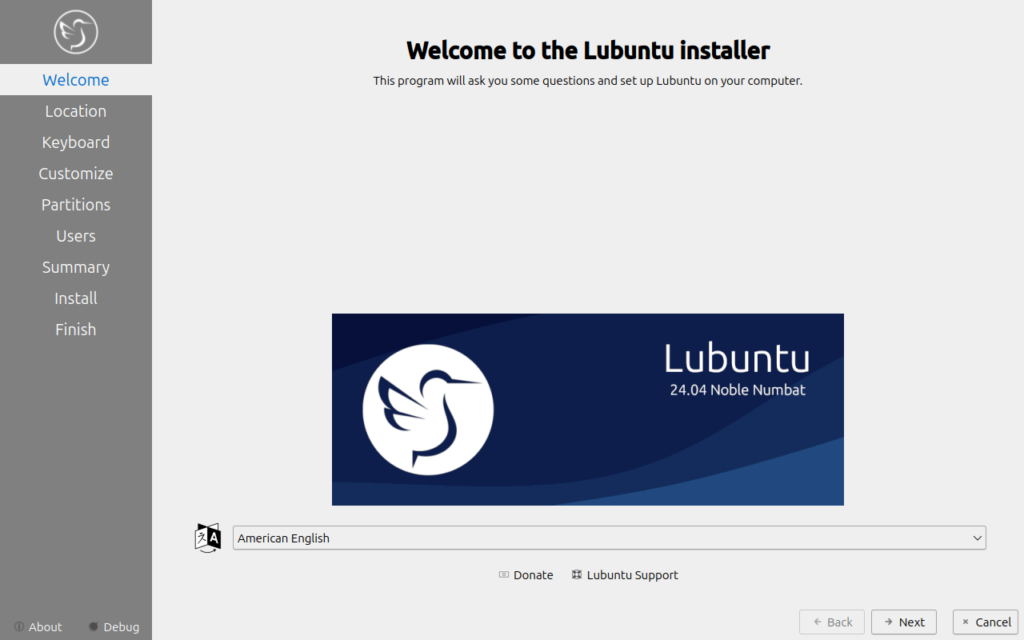

On the Welcome to the Lubuntu installer screen, click Next at the bottom of the screen.
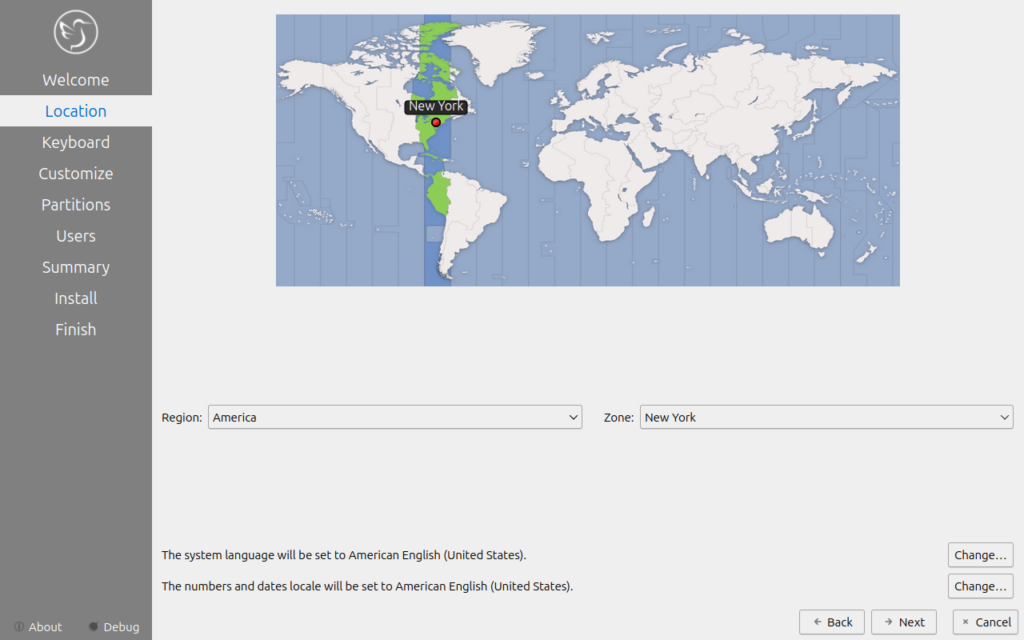

On the Location screen, select your Region and Zone, then click Next.
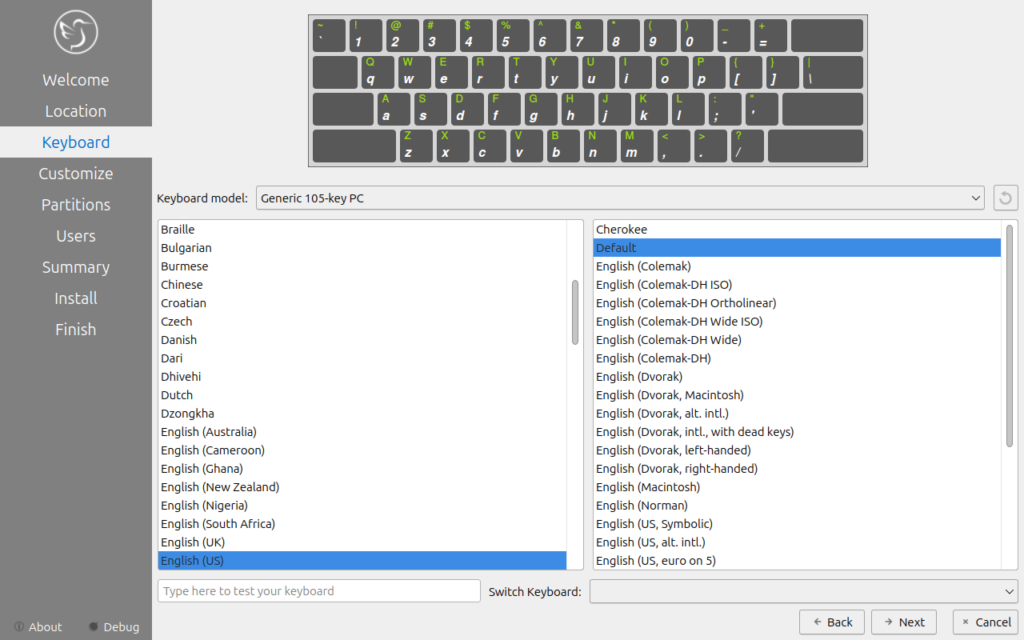

On the Keyboard screen, select your desired keyboard configuration, then click Next.
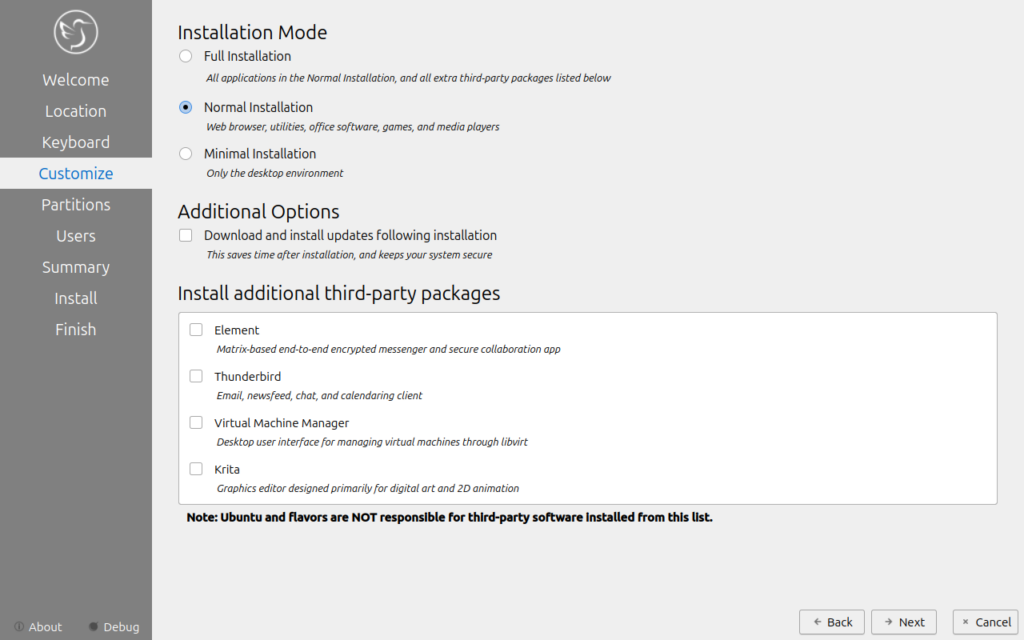

On the Customize screen, leave the defaults and click Next.

Once you are familiar with installing Lubuntu, you can try installing with different options depending on your intended use.
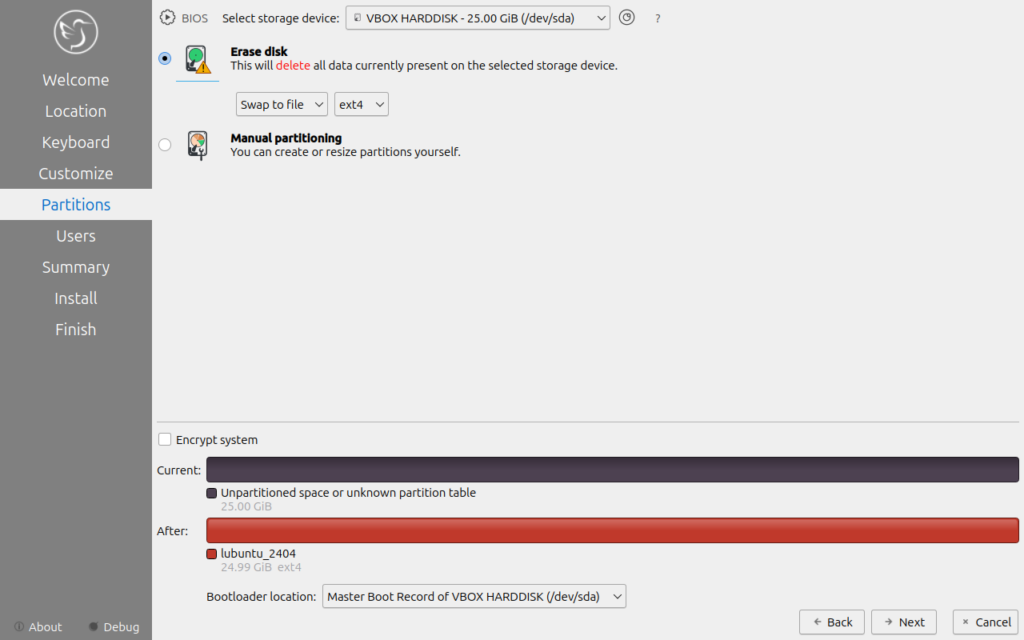

On the Partitions screen, select Erase disk, then click Next.
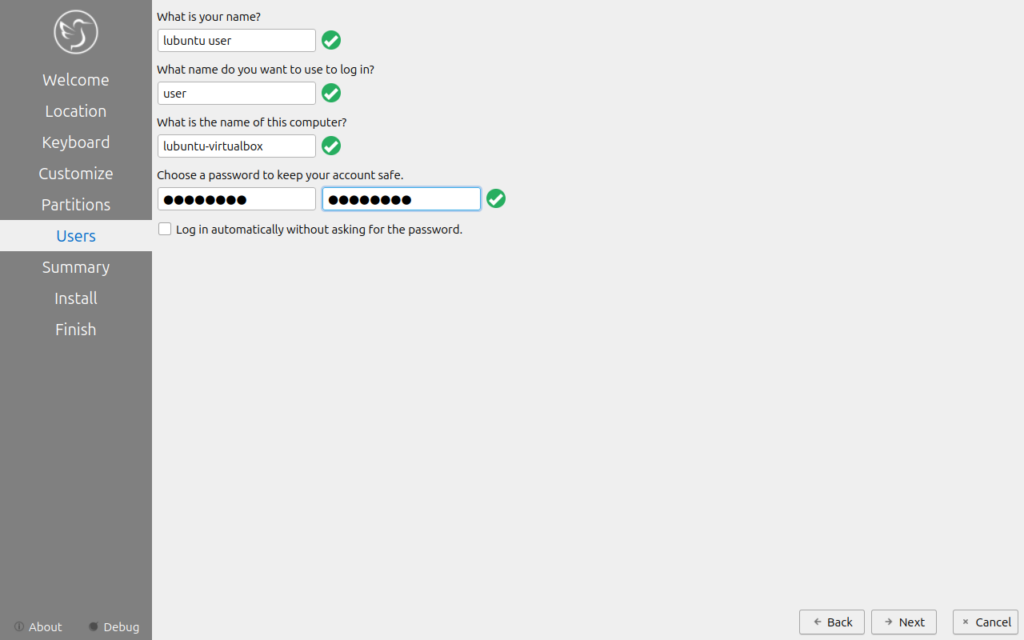

On the Users screen, enter your name, a user name, a computer name, and a password. Then click Next.
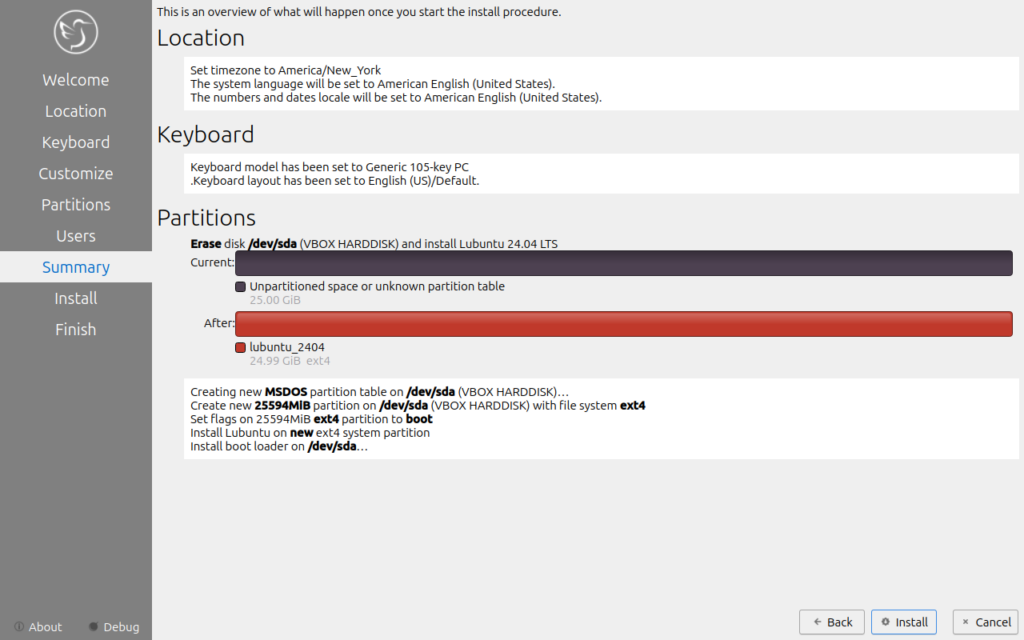

Review the Summary page, then click Install.


On the Continue with Installation alert, click Install Now.

Lubuntu will begin to install.
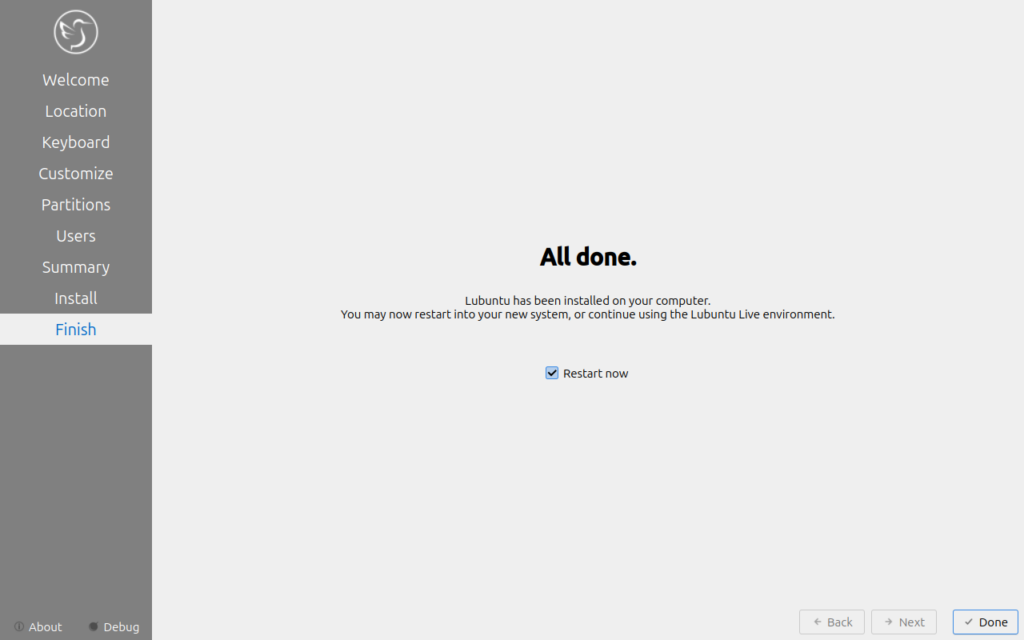

After some time, the installation process will finish. Leave Restart now checked and click Done.
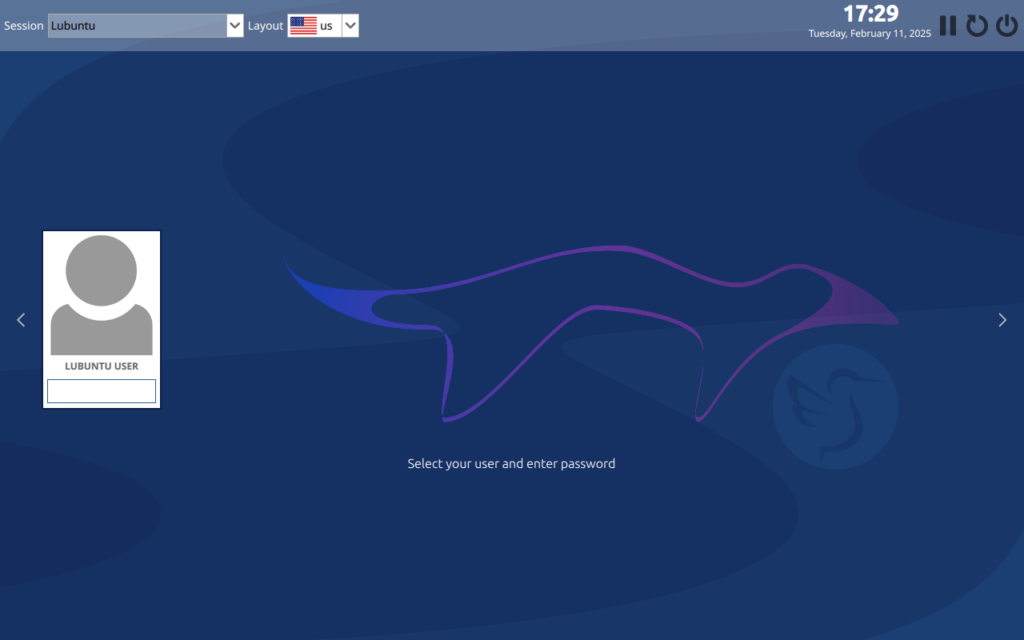

Once Lubuntu boots up, enter the password for the user you created above.
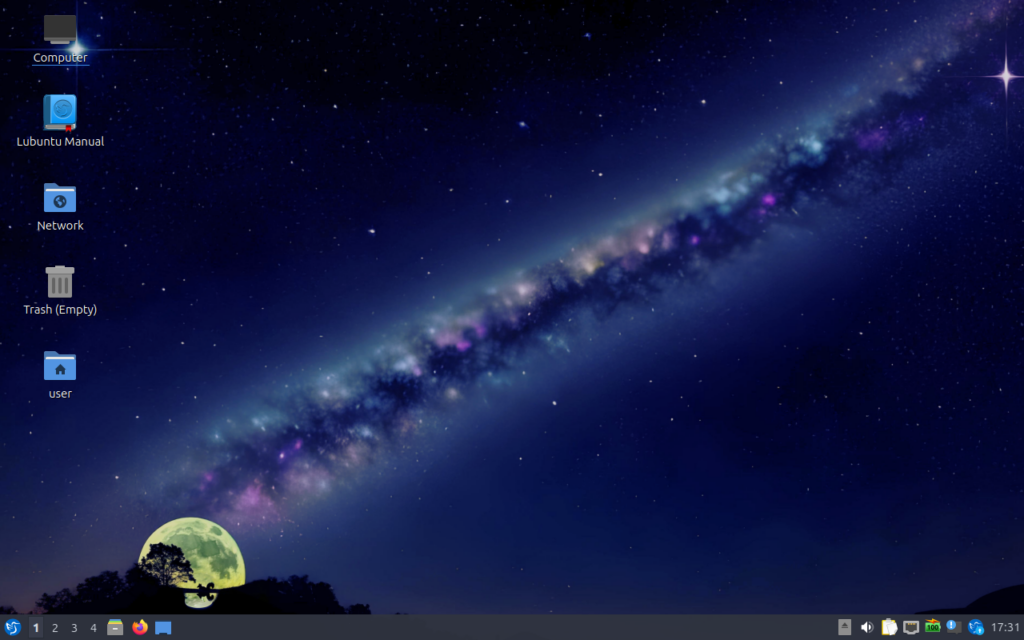

The Lubuntu desktop should come up.

At the bottom right of the desktop, click on the lubuntu-update icon.
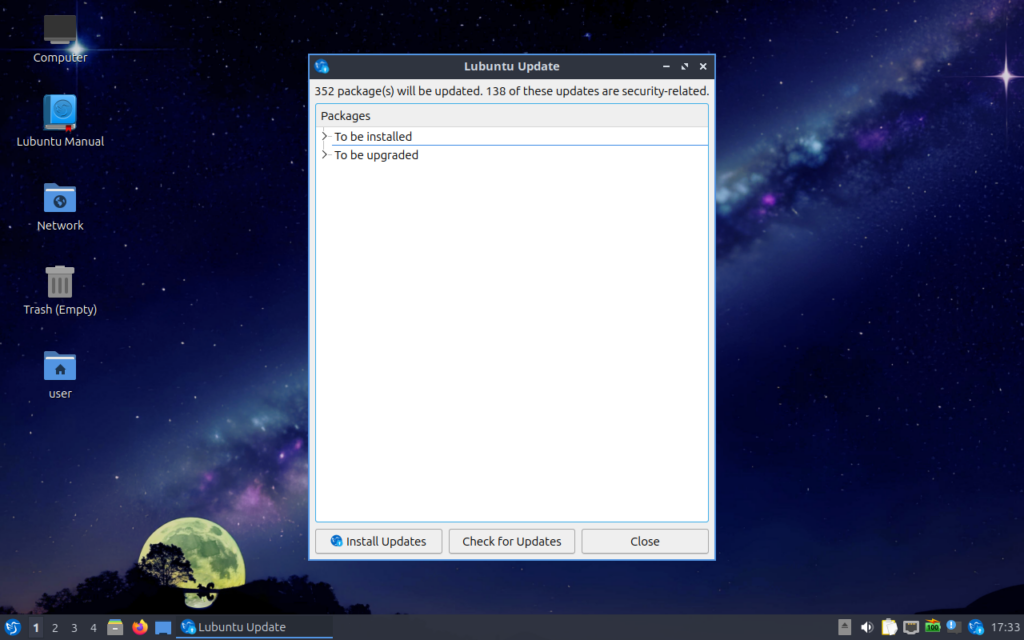

On the Lubuntu Update screen, click Install Updates. You may need to enter your password a few more times during the updates.

The update process may take awhile depending on the number of packages to be installed/updated.
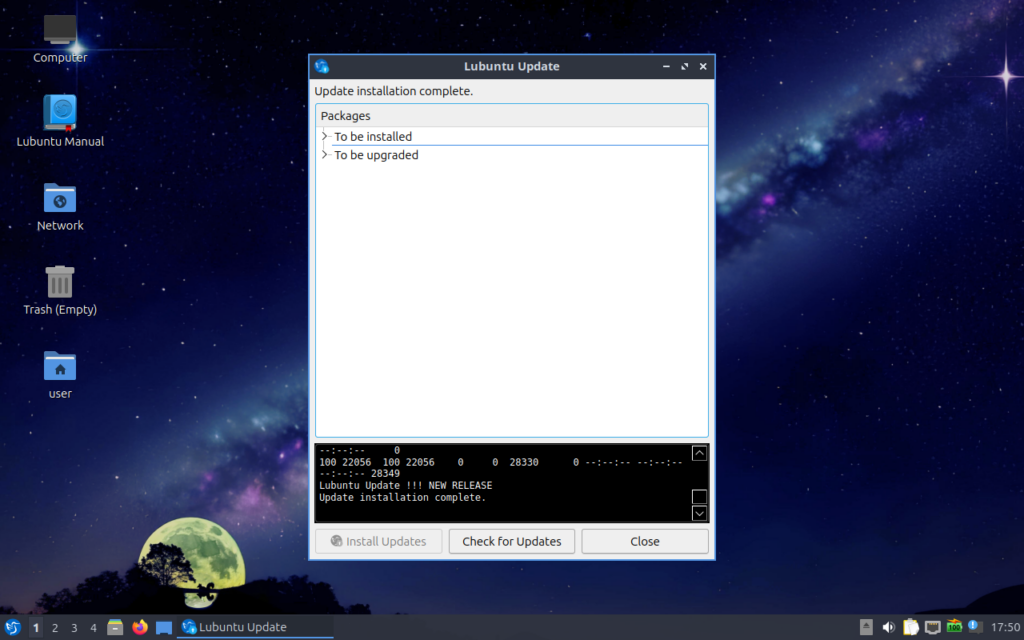

After some time the update process should complete. Click Close.

You can also click Check for Updates to see if there are any other updates to install.
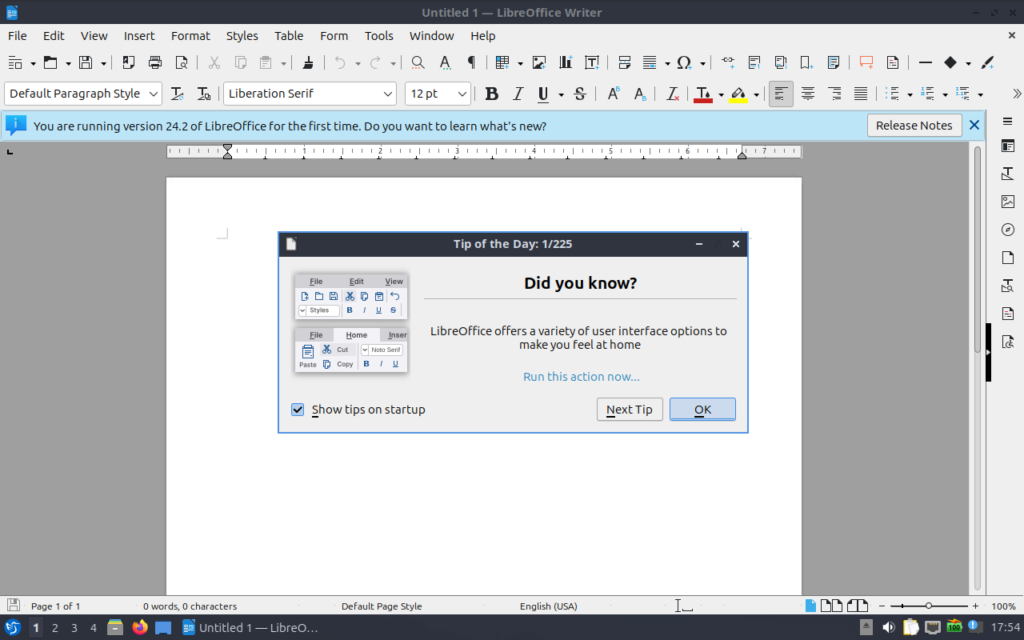

The Lubuntu desktop is much like Windows. For example, to open LibreOffice Writer, click on the Lubuntu icon in the bottom left of the screen, select Office from the menu, then click LibreOffice Writer.


I’ll leave it to you to explore the rest of the Lubuntu desktop.

When you are done with Lubuntu desktop, you can click the Lubuntu icon in the bottom left corner of the screen, then click Leave, and select Shutdown. This will shutdown Lubuntu.

To start Lubuntu again, just select the Lubuntu virtual machine in the Oracle VirtualBox Manager, and then click Start.

Creating An Ubuntu Virtual Machine

Earlier in my career, I spent ten years working at Citrix. In addition to my day job, I volunteered to maintain and lead the training for installing Citrix Virtual Apps And Desktops on Linux operating systems at Citrix events around the world. These events included Citrix Summit, Citrix Synergy, and internal training events. My Citrix training used the CentOS flavor of Linux. Unfortunately, CentOS was discontinued. This was a fun side activity at Citrix that allowed me to travel to Citrix events around the world, present in front of upwards of 100 people per session, and give me a lot of experience installing and configuring Linux operating systems.

In this blog post, I’ll install the latest (as of this writing) version of Ubuntu using Oracle VirtualBox. If you want to follow along and you don’t have Oracle VirtualBox installed, please see Installing VirtualBox On Windows.

Let’s Get Started

Using your favoriate web browser, browse to https://ubuntu.com/.


Click on Download Ubuntu at the top right.


Click on Download Ubuntu Desktop.


Download the lastest version of Ubuntu Desktop. As of this writing, the latest version is 24.04.1 TLS.

Click on Download 24.04.1 LTS. The download should start. It will take a few moments to download “ubuntu-24.04.1-desktop-amd64.iso”.


Once ubuntu-24.04.1-desktop-amd64.iso is downloaded, open Oracle VirtualBox Manager. If you don’t already have Oracle VirtualBox Manager installed, please see Installing VirtualBox On Windows.


Once Oracle VirtualBox Manager is open, click on New.


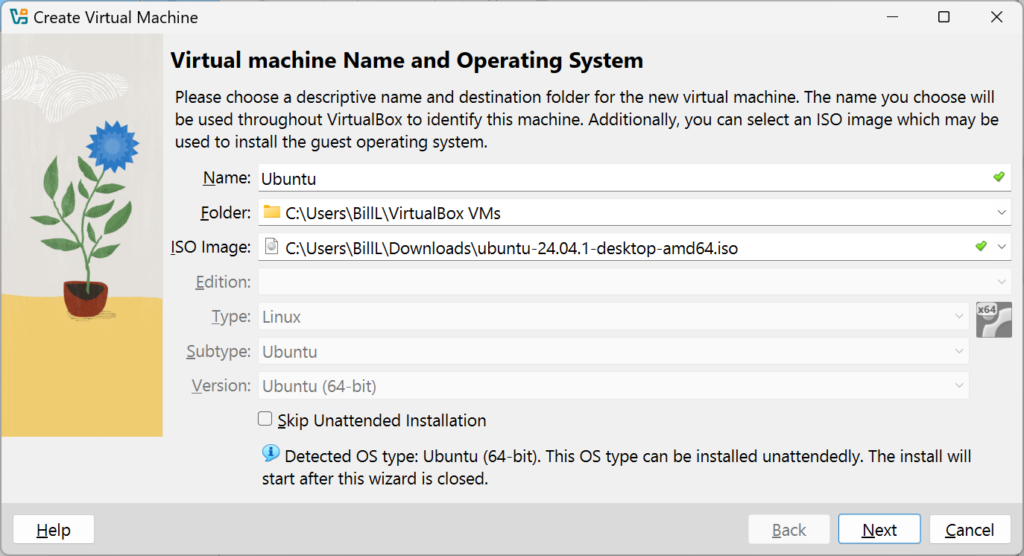
On the Virtual machine Name and Operating System dialog, fill in the form, giving the virtual machine a name of Ubuntu and select the ISO Image ubuntu-24.04.1-desktop-amd64.iso downloaded above. Click Next.


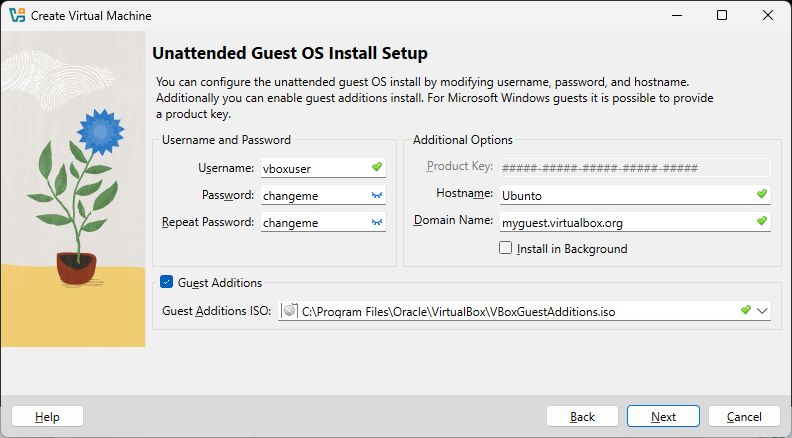
On the Unattended Guest OS Install Setup dialog, click the eye icon next to the Password so that you can see what it is. Change the Username and Password as desired. Select the Guest Additions. Click Next.


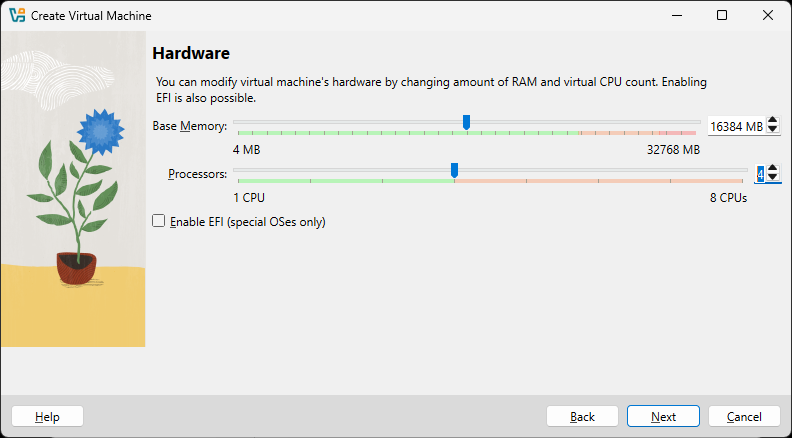
On the Hardware dialog, increase Base Memory to 16384 MB and increase Processors to 8 CPUs. Click Next.

You will need to play with these settings to figure out what is the a good balance on your hardware.


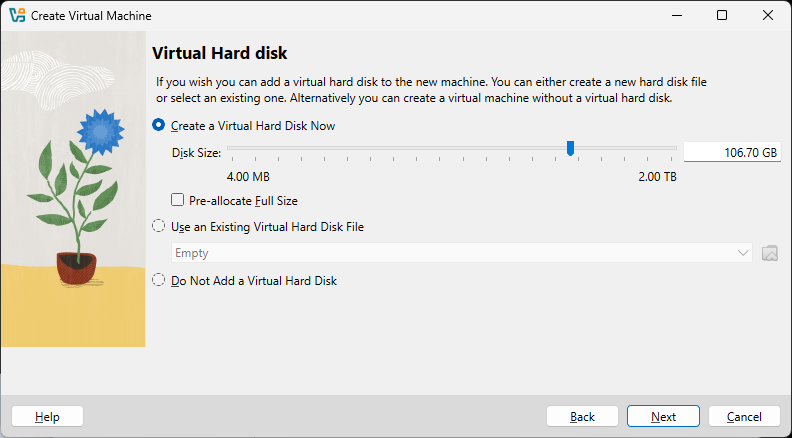
On the Virtual Hard Disk dialog, increase the Virtual Hard Disk size to about 100 GB. Click Next.

You will need enough disk space to install and update the operating system, add additional software, etc. Again, you will need to play with this setting to figure out works best for your system.


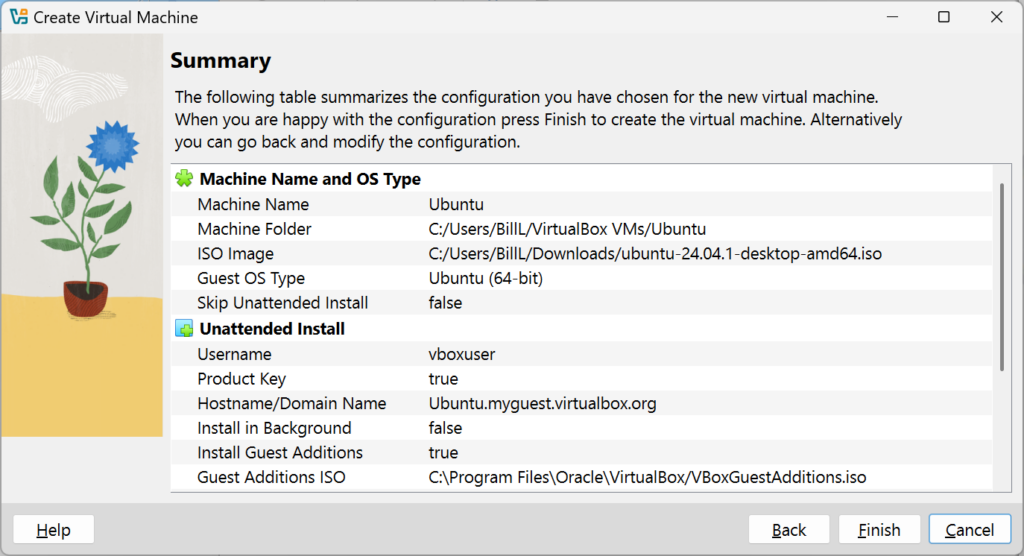
On the Summary dialog, review the settings, then click Finish.


It will take the Oracle VirtualBox Manager some time to install and configure Ubuntu.

Give Ubuntu time to install and configure itself.

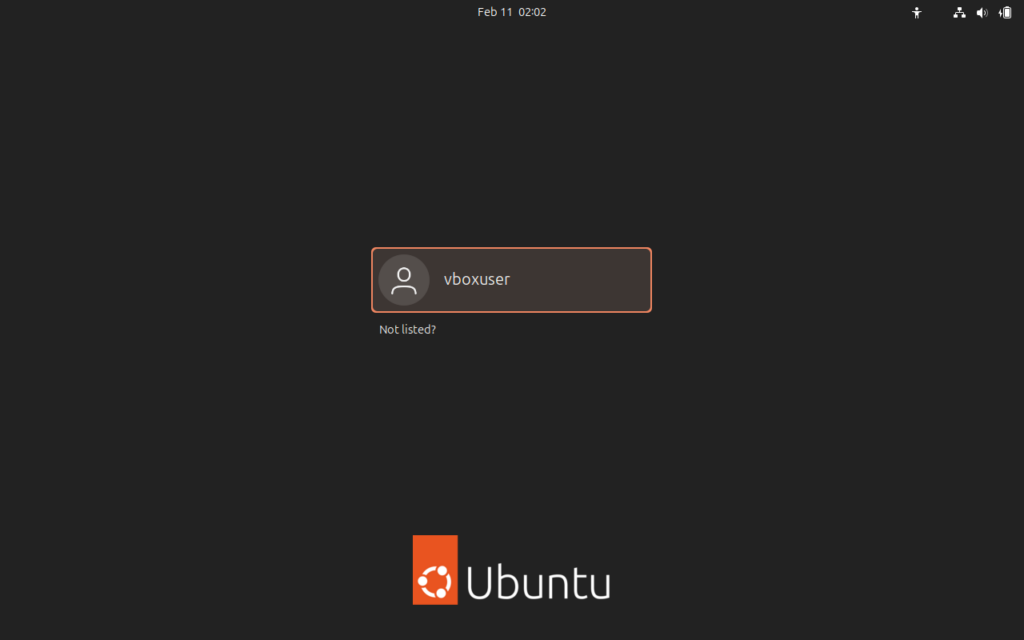
Once the login screen is display, use the Username and Password from the Unattended Guest OS Install Setup dialog and log in.


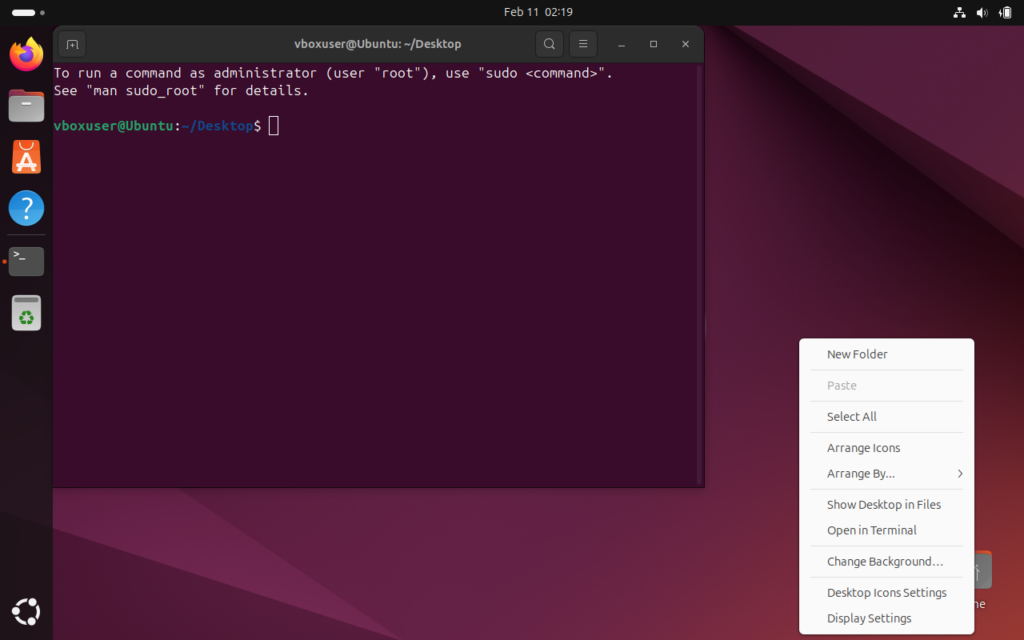
Once the Ubuntu desktop comes up, open a terminal, right click on the desktop and select Open in Terminal.


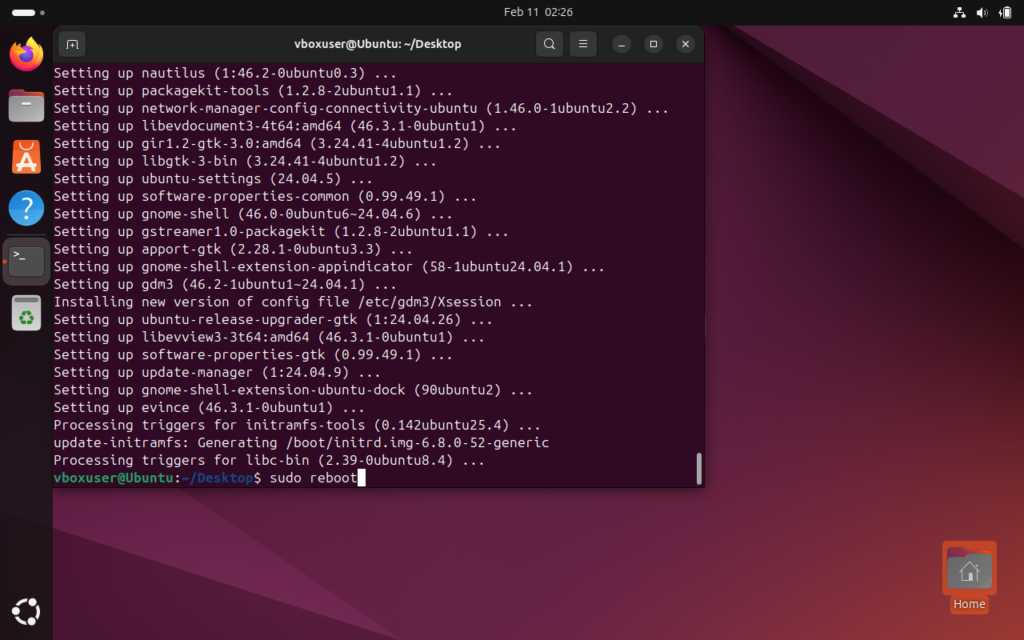
Fetch update software list by running the sudo apt-get update command

Update Ubuntu software by running the sudo apt-get upgrade command

Finally, reboot the Ubuntu box by running the sudo reboot command.


You can delete the virtual machine from the Oracle VirtualBox Manager and then recreate it using differnent settings for memory, CPUs, virtual disk space.

When it comes to virtual disk space, remember that you will be installing the operating system, adding applications, creating data and logs. Make sure to provision enough space.

Installing VirtualBox On Windows

In this post, I will walkthrough installing Oracle VirtualBox on a Windows 11 laptop. VirtualBox is a general-purpose full virtualization software package targeted at laptop, desktop, server, and embedded use. As of this writing, the latest version is VirtualBox 7.1.6. If you install a different versions, the steps and screen shots may differ. VirtualBox can be found at virtualbox.org.

Let’s Get Started

Using your favoriate web browser, browse to virtualbox.org.


Click the Download button.

For this article, I will be installing Oracle VirtualBox on Windows. If you choose another operation system, you may have to make adjustments in the following steps.


Click the Windows hosts link.


Once VirtualBox-7.1.6-167084-Win.exe is downloaded, double-click on the VirtualBox-7.1.6-167084-Win.exe file.


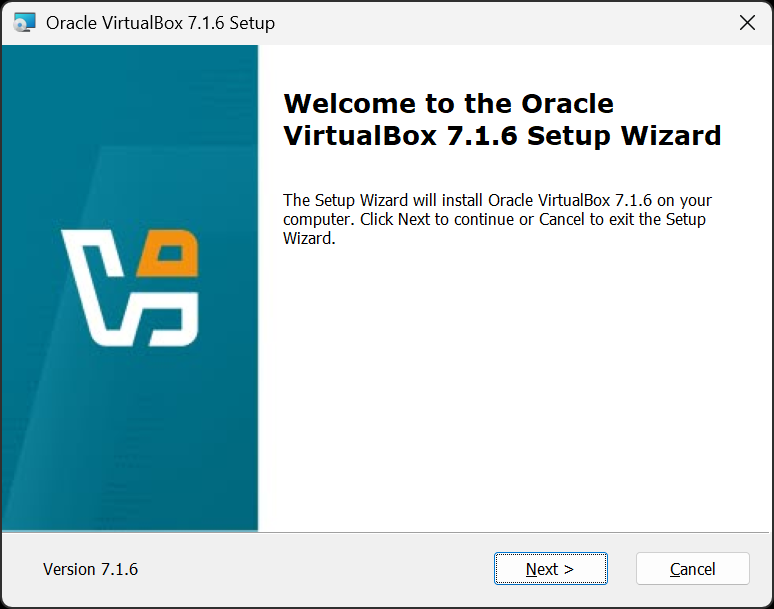
On the Welcome to the Oracle VirtualBox 7.1.6 Setup Wizard dialog, click Next.


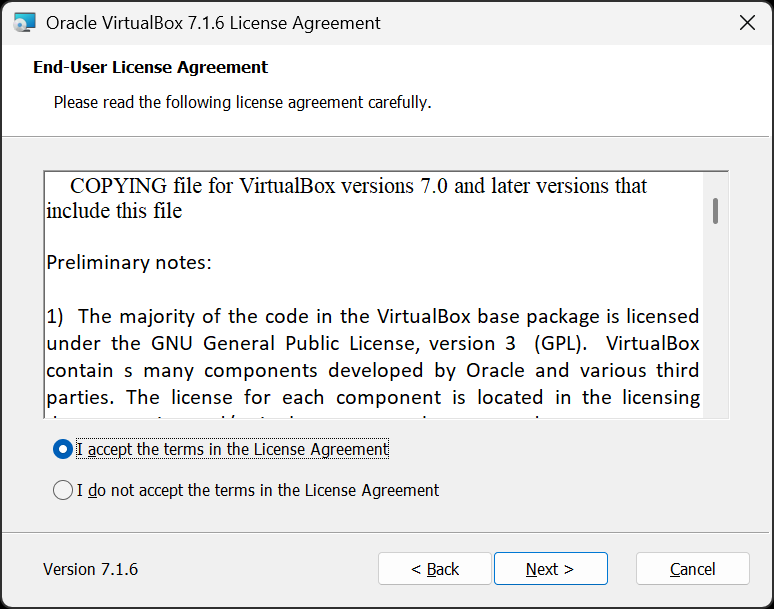
On the Oracle VirtualBox 7.1.6 License Agreement dialog, read through the End-User License Agreement. Select the I accept the terms in the License Agreement radio button. Finally, click Next.


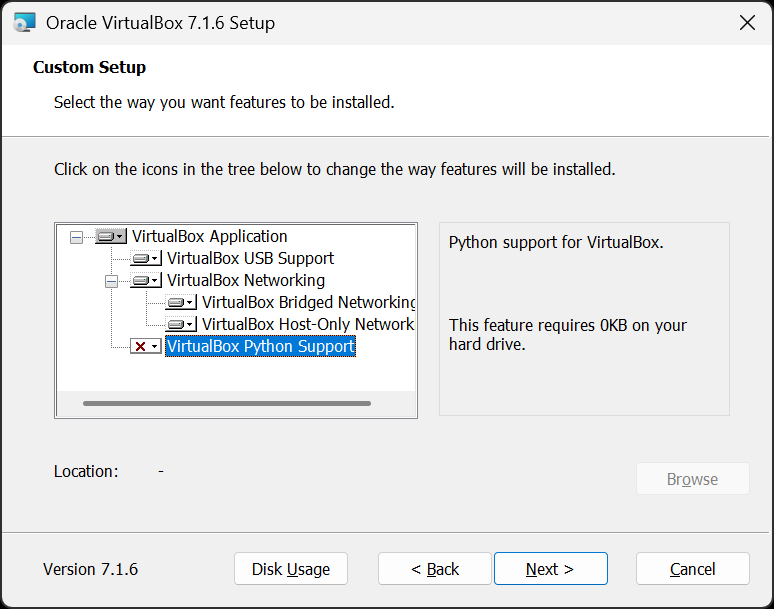
On the first Custom Setup dialog, deselect VirtualBox Python Support, then click Next.

If you need VirtualBox Python Support and know how to use this feature, you can leave it selected.


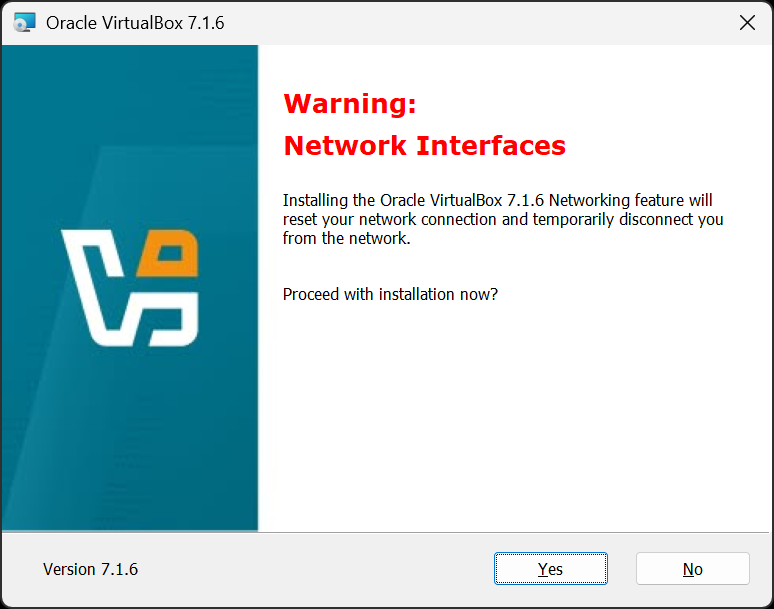
On the Warning: Network Interfaces dialog, click Yes.


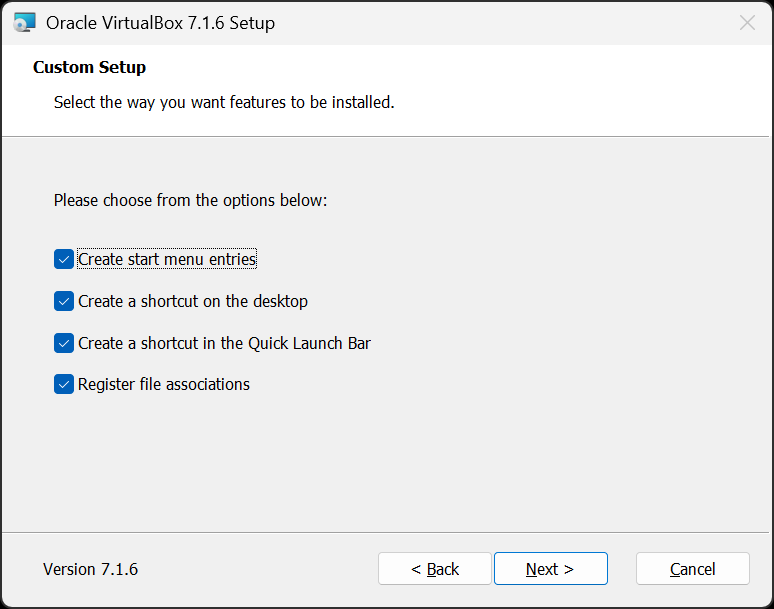
On the second Custom Setup dialog, leave all the options checked, then click Next.


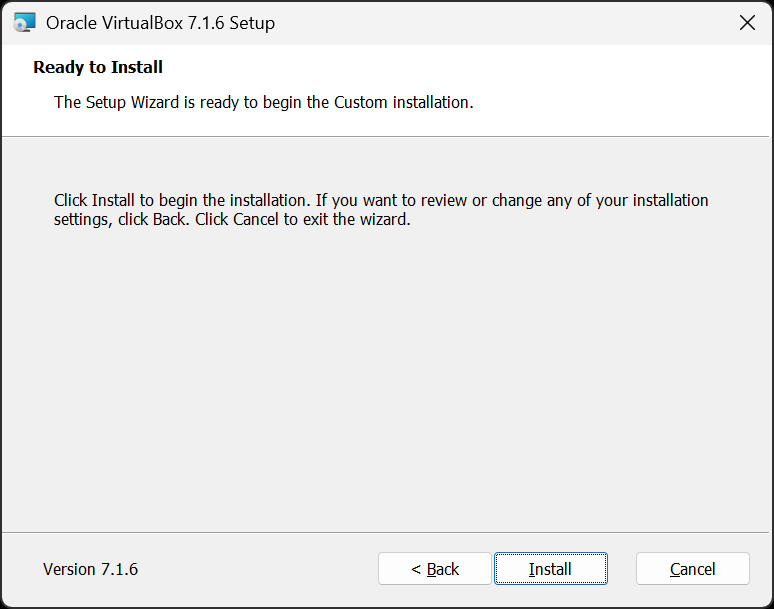
On the Ready to Install dialog, click Install.


Oracle VirtualBox 7.1.6 will begin to install. it will take a few moments to install. Wait until installation is complete.


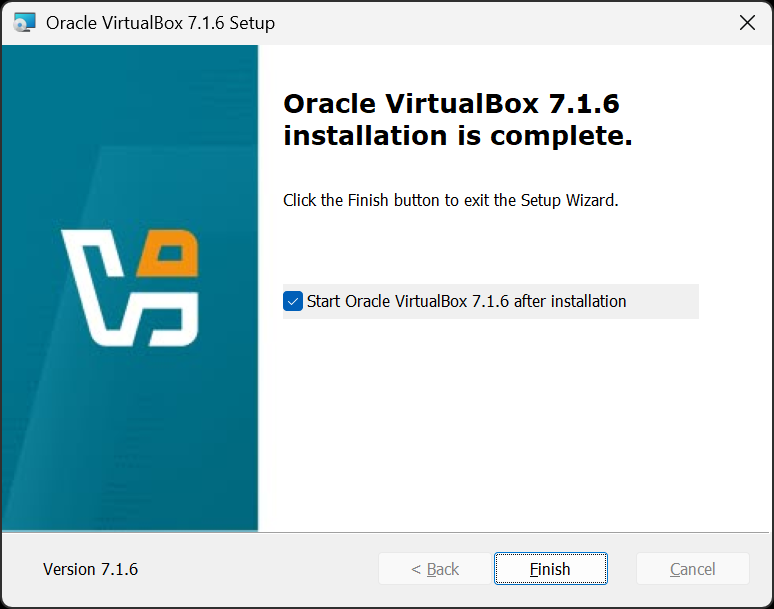
On the Oracle VirutalBOx 7.1.4 Installation Is Complete dialog, click Finish.


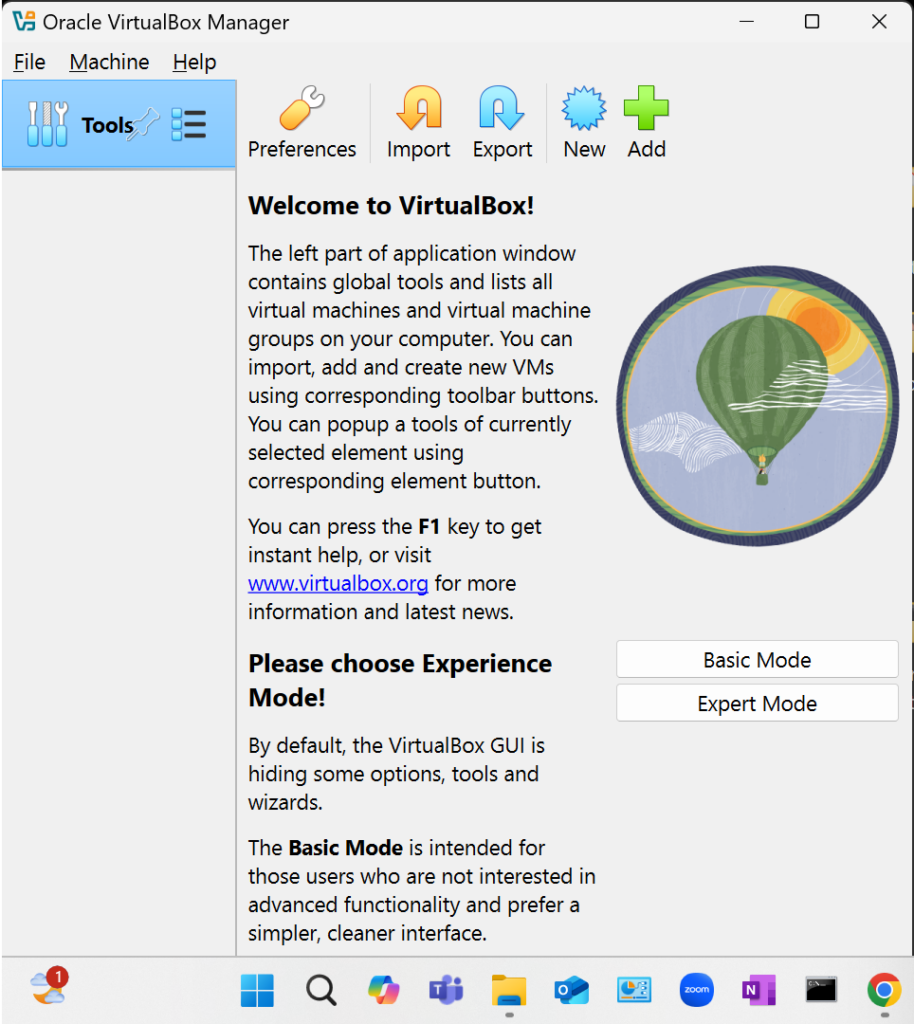
The Oracle VirtualBox Manager Welcome to VirtualBox (Basic/Expert selection) dialog should open. Click Basic Mode.


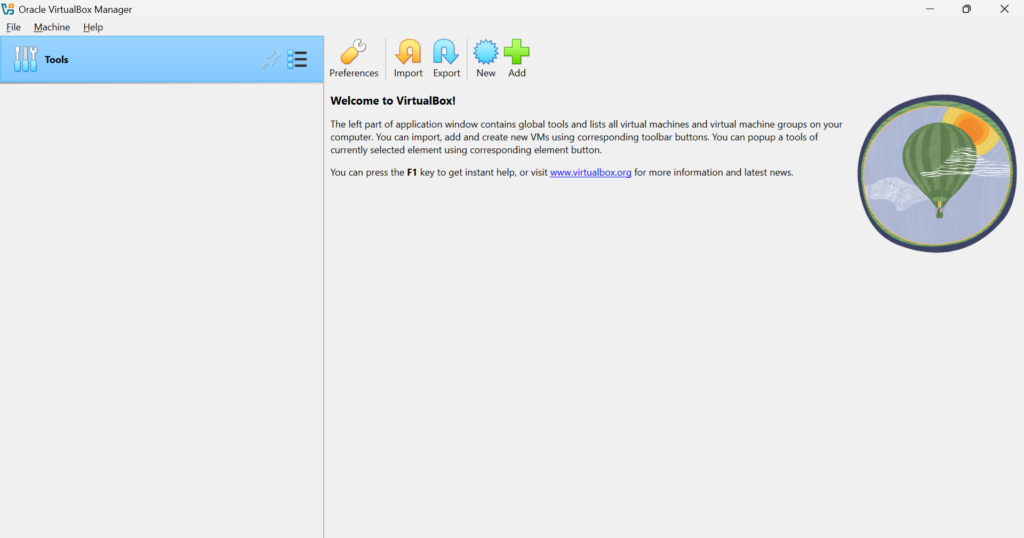
The Oracle VirtualBox Manager Welcome to VirtualBox (Basic) dialog should open.

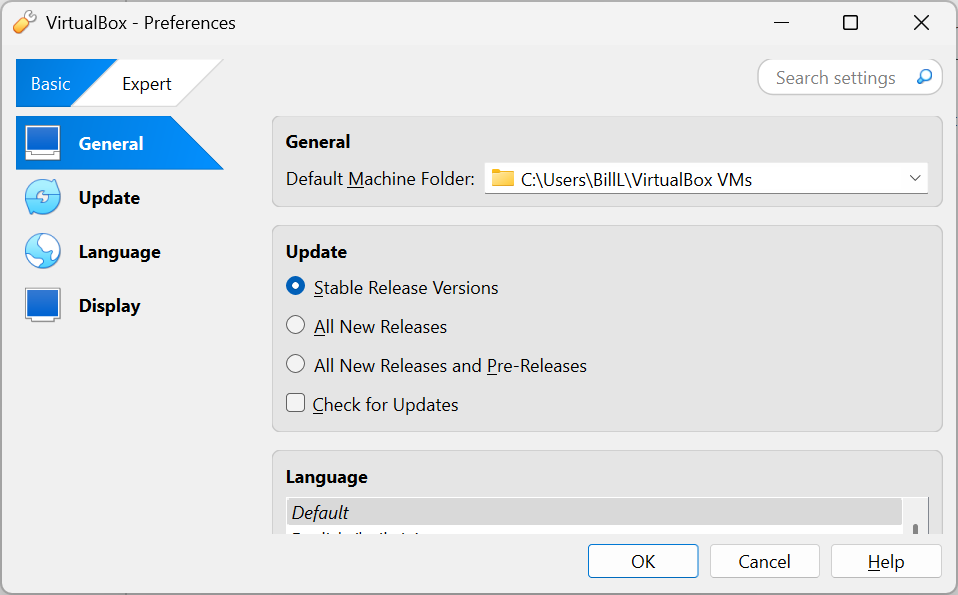
You can alway switch between Basic Mode and Expert Mode by clicking on the File menu, then selecting Preferences, then …


On VirtualBox Preferences dialog, click on either Basic or Expert mode, then click the OK button.


Next time, we’ll look at creating an Ubuntu virtual machine with VirtualBox.